
Invicta 8926 bezel modification.

This is for entertainment purposes only. If you try this and injure yourself or destroy your watch I cannot be blamed. Also Invicta changes design specs from time to time and I cannot guarantee these instructions will work for any past or future production 8926
This is instruction for the 8926OB with NH35A and NH25A movement.
First you need to read the following article. http://www.stefanv.com/watches/black-lagoon-an-homage-to-the-tudor-heritage-black-bay.html
It wasn't written by me, I don't know the guy who wrote it but he knows what he is doing. Only thing different that I'd do is to remove the crystal before removing the bezel insert. You can get the bezel insert off without risk of damage because you will have access to the underside of it with the crystal out.
Once the Bezel is off the watch you will need several tools.
1. Drill press
2. 1 ½" drum sander kit
3. Some sharp bastard files
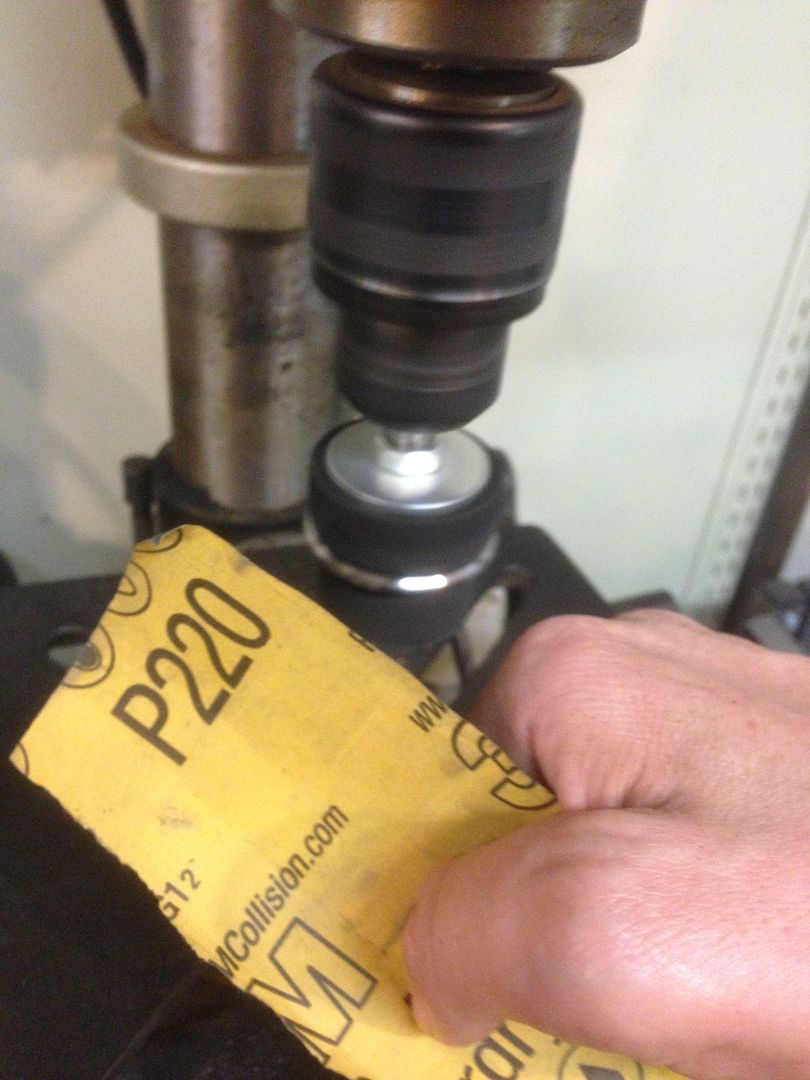
4. A selection of wet/dry sand paper 200 grit 400 grit
5. A bench vice
6. A checkering file. Mine is 50 lpi. You may want to try a 40 lpi or a 30 lpi depending on what you are trying to achieve.
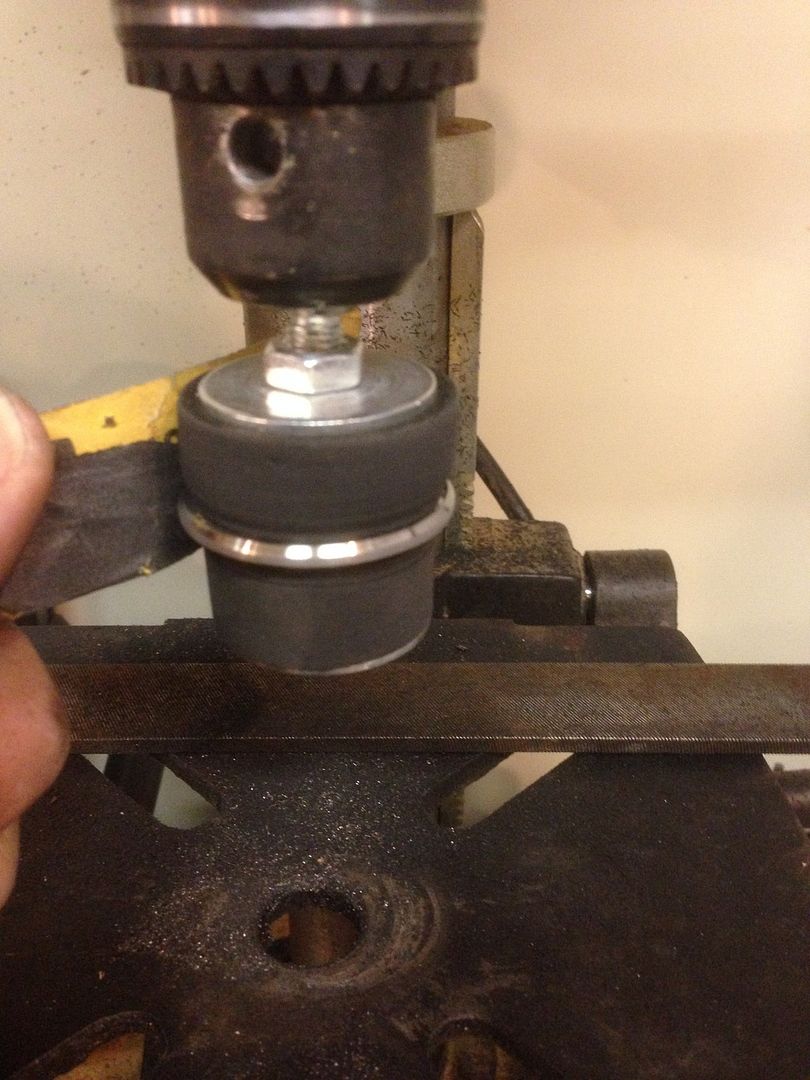
Chuck up your drum sander and remove the sand paper. Now turn on your drill press and place a bastard file about halfway down the drum and reduce the diameter of the lower half so that you can slip the bezel insert onto it. About 34.4mm.
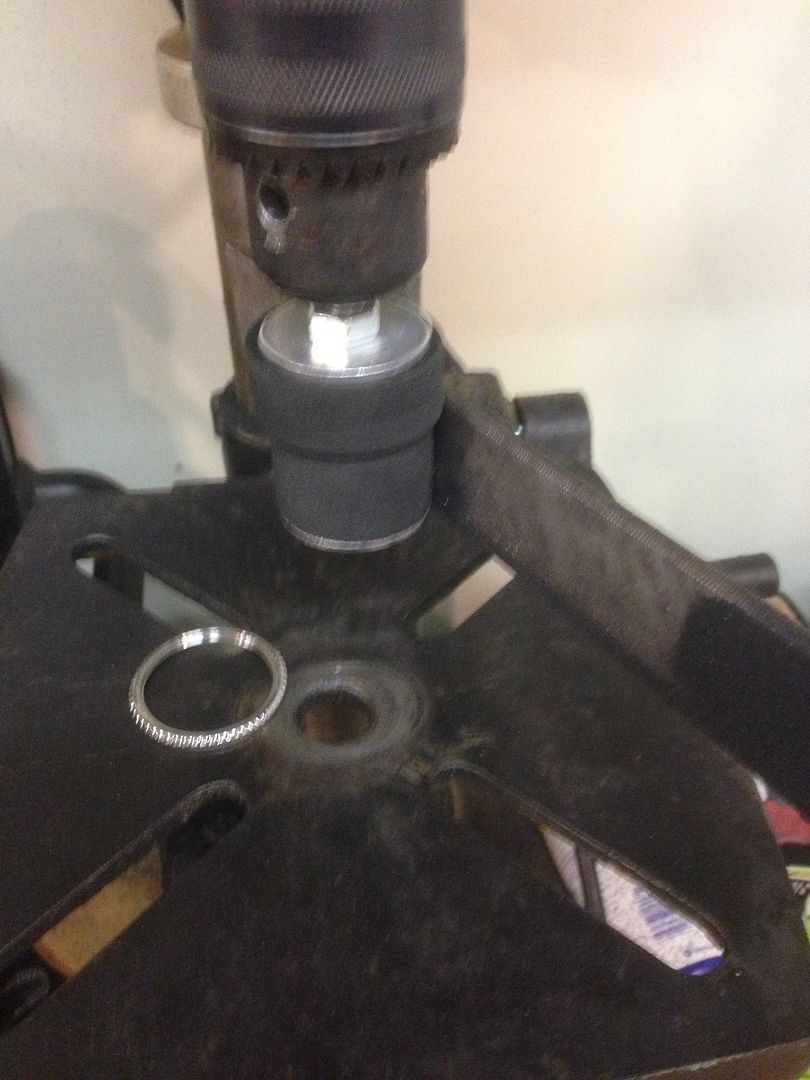
Slip the bezel insert onto the drum and tighten the nut on the drum until the bezel is held securely on the drum.
Turn on the drill press and use a bastard file to remove the old coin or scallop edge of your bezel. Start from the side and then I hold the file at an angle to remove the coin or scallop edge. You need to be careful not to reduce the height of the bezel and don't push too hard or you will cause the top edge to turn inward effectively reducing the size of the area for your insert. If you reduce the area for the insert you will need to remove material from inside the bezel lip to get the insert back in, so again, do not push too hard while working the top of the bezel.
Stop often to check your work. You do not want to remove too much material.
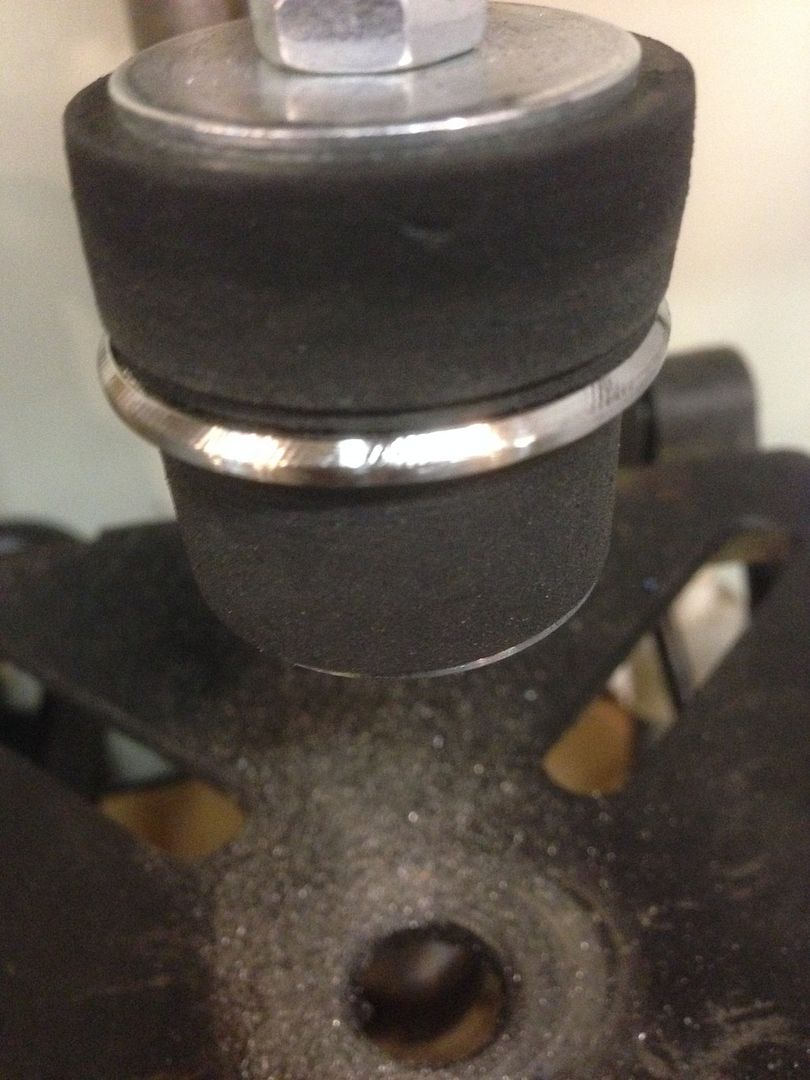
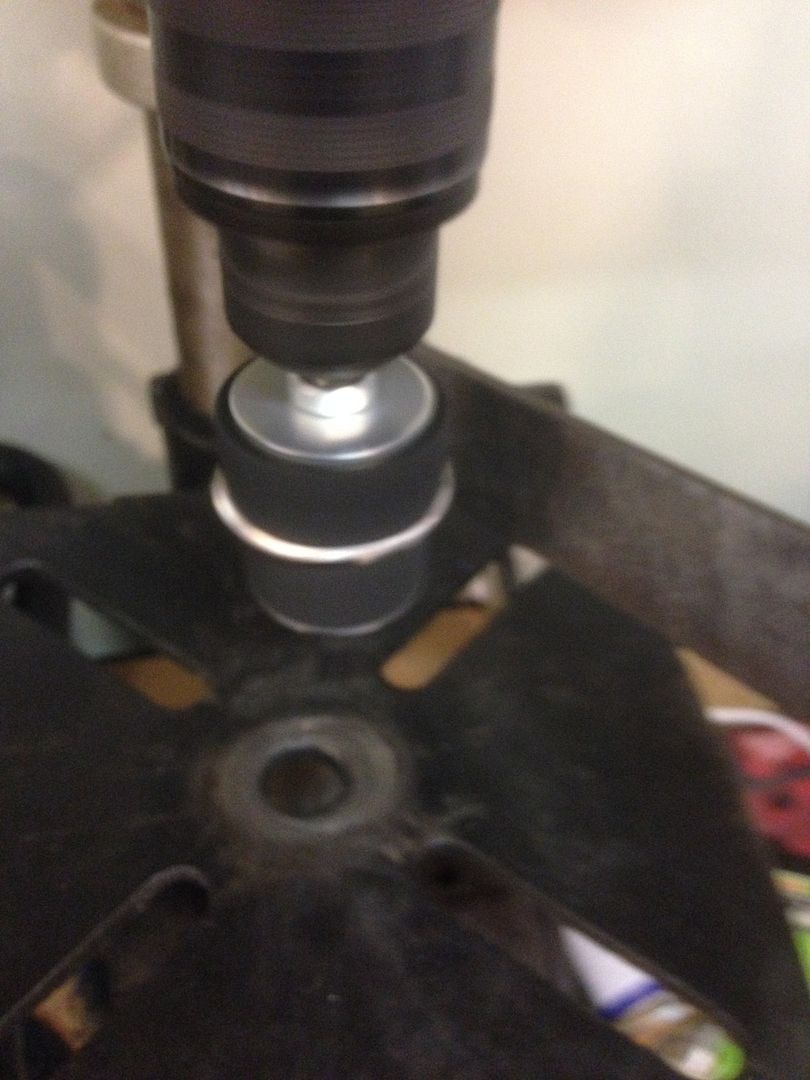
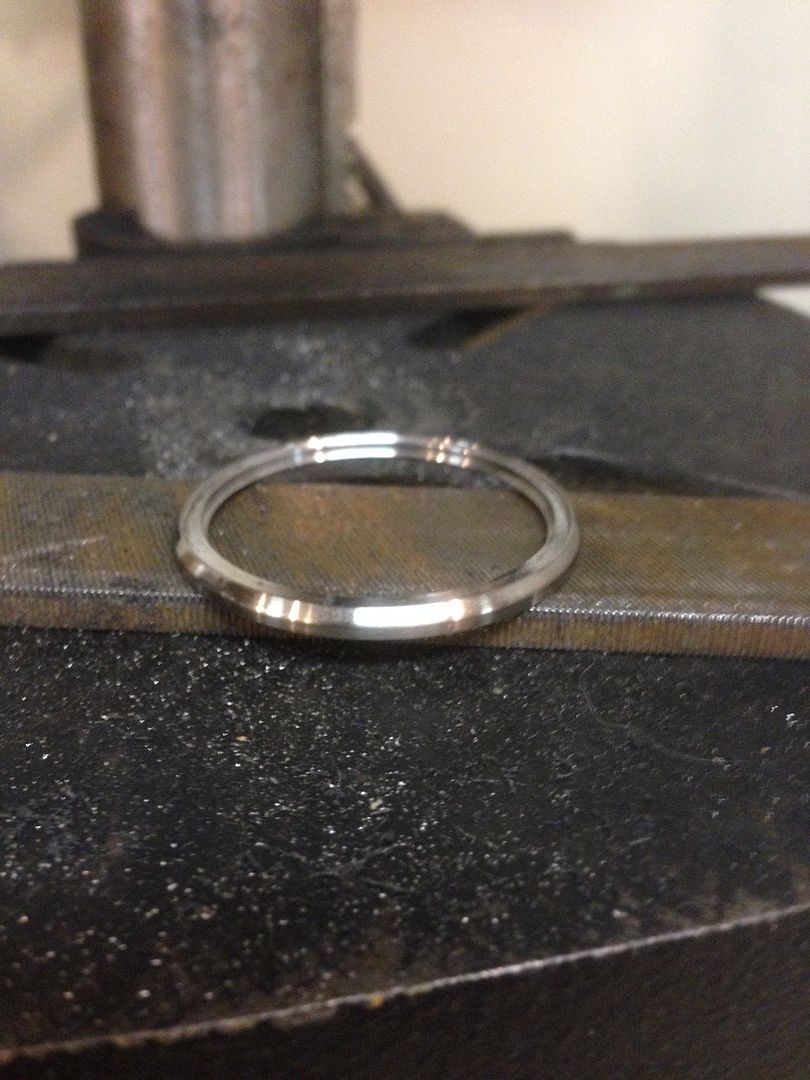
Once the coin or scallop edge is gone and the bezel is free of ridges or dips run some 220 grit sand paper over the bezel while it is spinning in the press. Then move to 400 grit. This will clean up some of the lines left by the file.
Once you are satisfied remove it from the press and move to the vice. You will need a padded vice or you will mess up your bezel. I use 2 wood blocks in the jaws of the vice. Place the bezel in the vice and get out your checkering file.
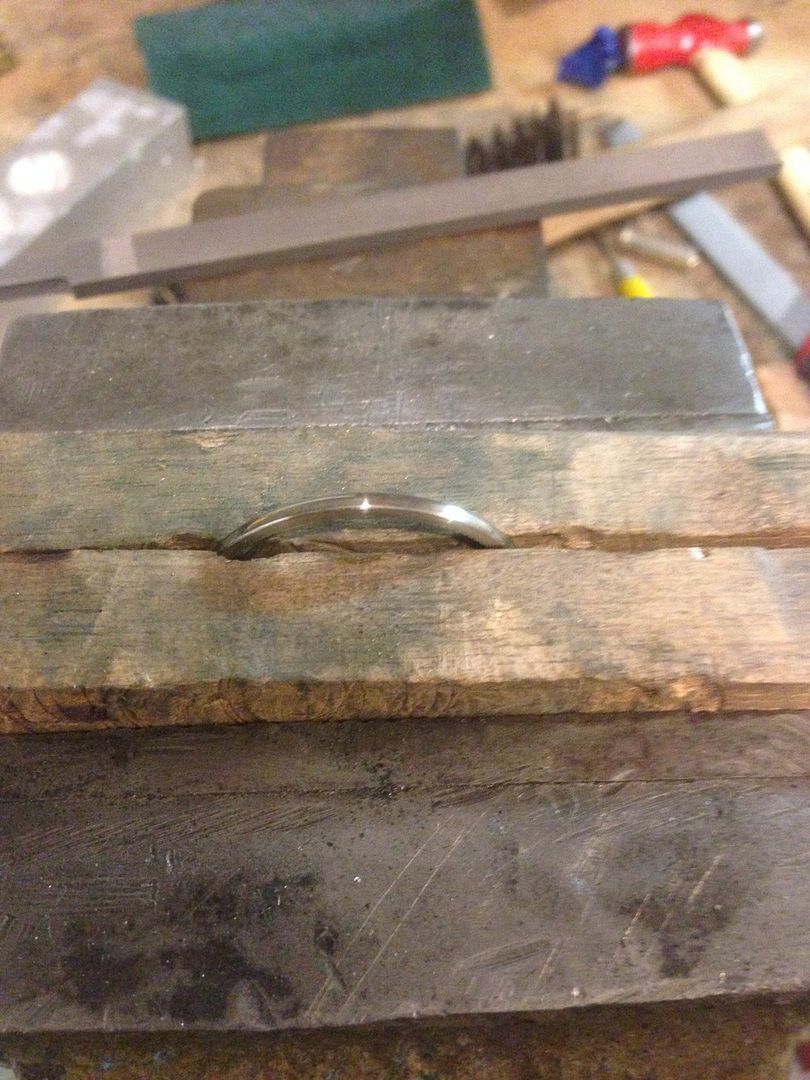
Make sure you are square before you start with the checkering file. Start cutting with the checkering file but do not make the first pass too deep.
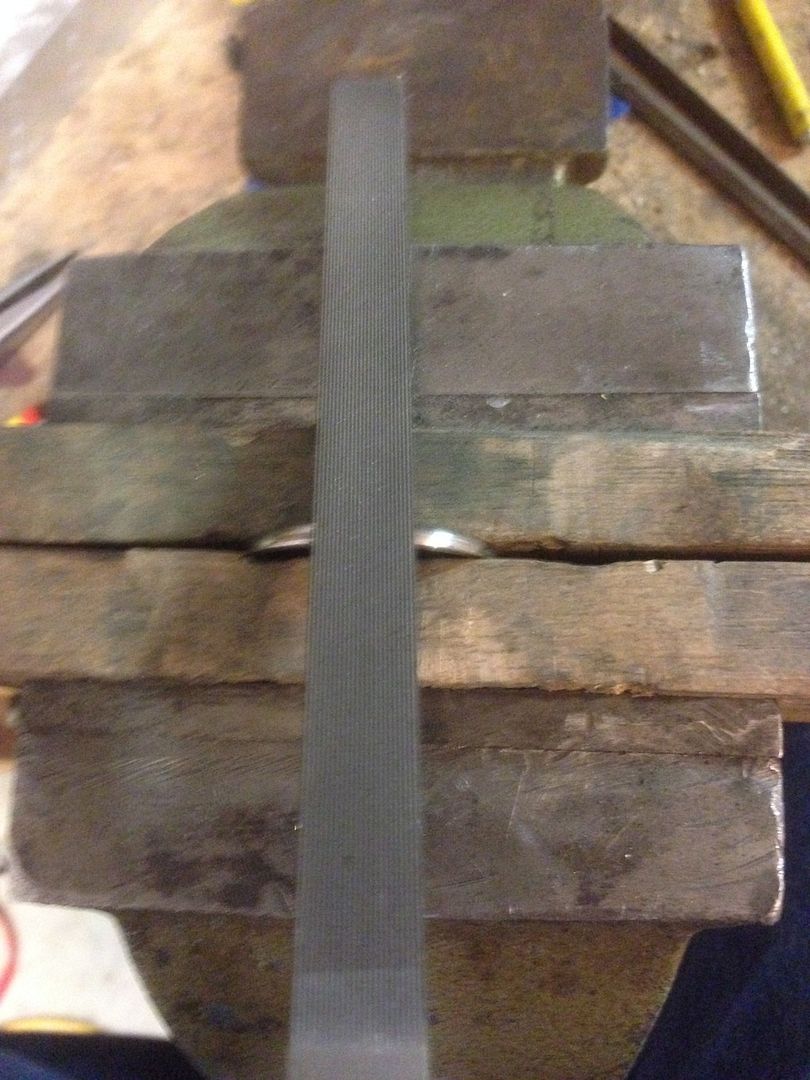

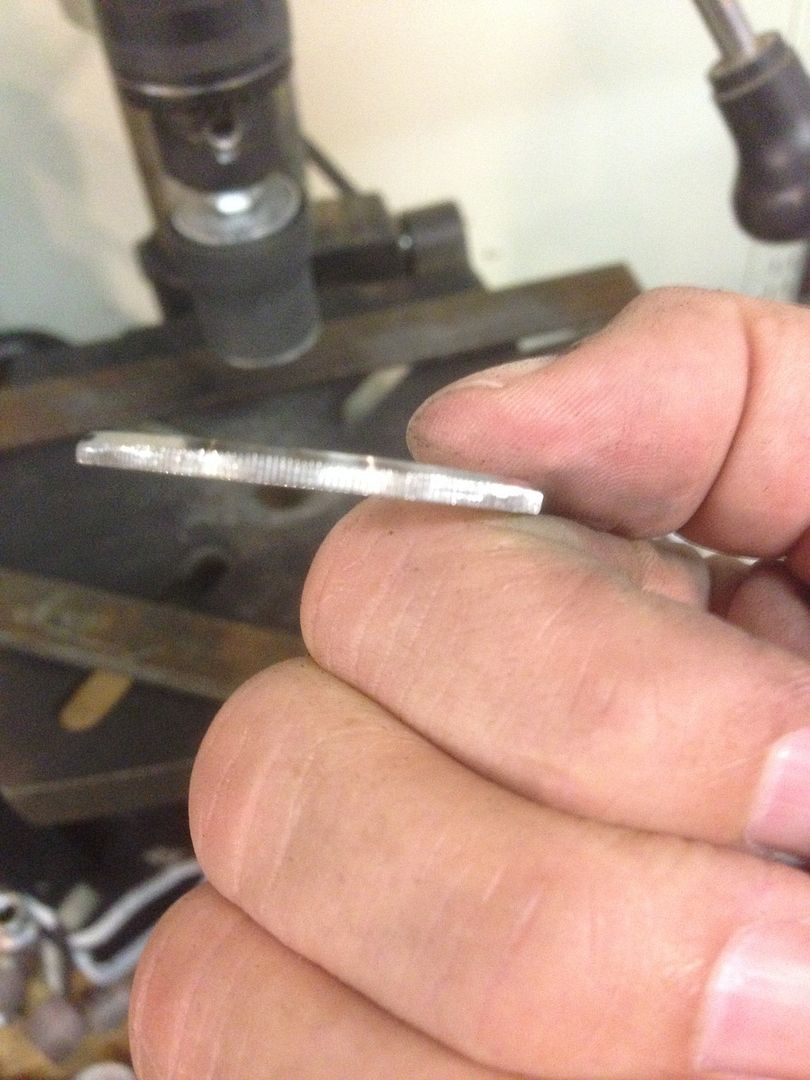
Run the file back and forth in the same place each pass slightly tilting the file right or left to run as many lines as possible before picking up the file. DO NOT ROCK THE FILE SO FAR THAT THE EDGE OF THE FILE IS CUTTING ANY MATERIAL. THIS WILL CAUSE THE FILE TO CUT DEEPER THAN ANY OF THE OTHER LINES AND YOU WILL HAVE DEEP UGLY LINES EVERY HALF INCH OR SO ON YOUR BEZEL. BE CAREFUL NOT TO DO THIS AS IT IS EASY TO DO. We are laying out the lines right now. You will want to overlap each pass of the file with the previous pass. Do this until you have covered all the area of the bezel you can reach then open the jaws of the vice slightly and turn the bezel until 75% or so of what you have filed is no longer exposed. Work your way around the bezel until you have covered the entire bezel. Now go over your work again with the same file and cut deeper.
Once you have gone all the way around the bezel the second time remove it from the vice and inspect it for any lines that are not cut deep enough or anything else that would cause you concern. If it looks good place the bezel onto the sanding drum on the drill press and run the drill press. Use your 220 grit paper to knock down the burrs on the bezel. Then move to your 400 grit. Stop often to check your work.
When the bezel looks good remove it from the sanding drum and clean it up. I use dish soap and water and an old tooth brush.
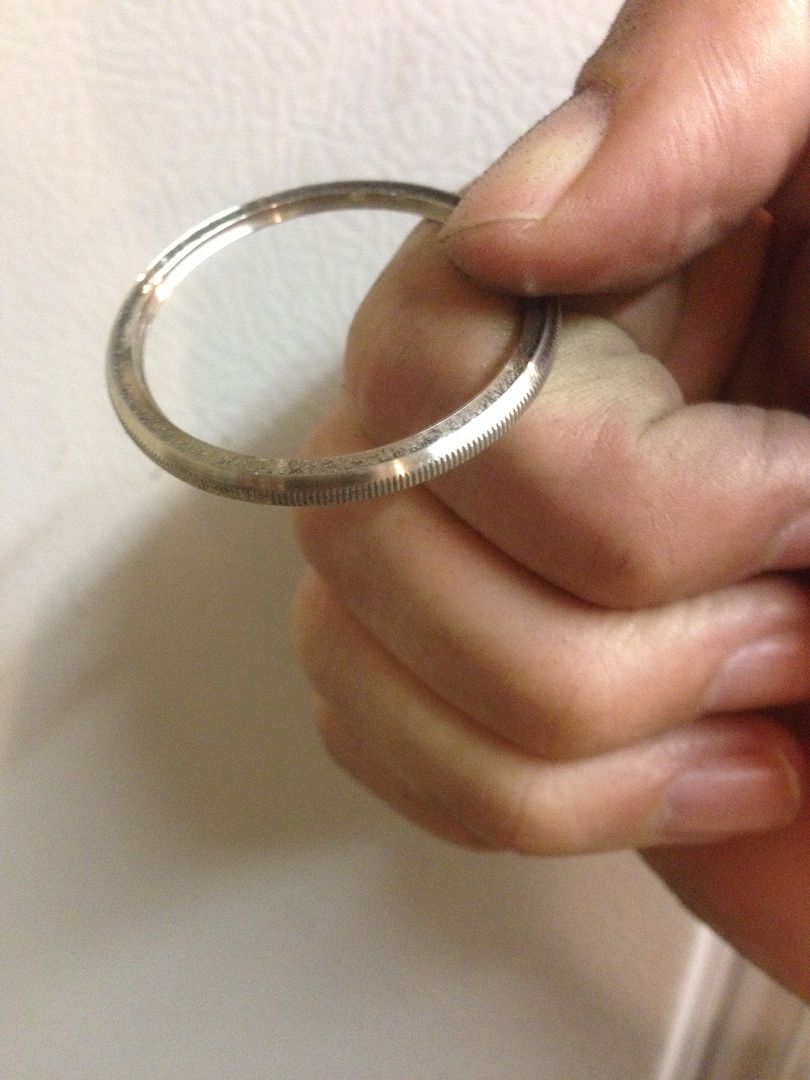
Dry it and test fit your original bezel insert to make sure you didn't accidently push material into the area where the bezel resides. If your bezel insert still fits, it is ready to install. If it does not fit you will need to take the tip of the file (no, not the tang of the file, the top of the file) and hook it onto the lip of the bezel where the insert goes and run it around that edge. As you do this apply pressure, you should start seeing a little metal lip form around the bezel as you run the file around the edge. Once that lip is formed all the way around you will want to sand it off. Check to see if your bezel insert fits now. If it doesn't you will need to do it some more until it does fit. The file will want to come out of the lip and when it does it may scratch your bezel. If that happens don't try to fix it until your bezel insert will fit into the bezel. That way you won't have to erase scratches twice.
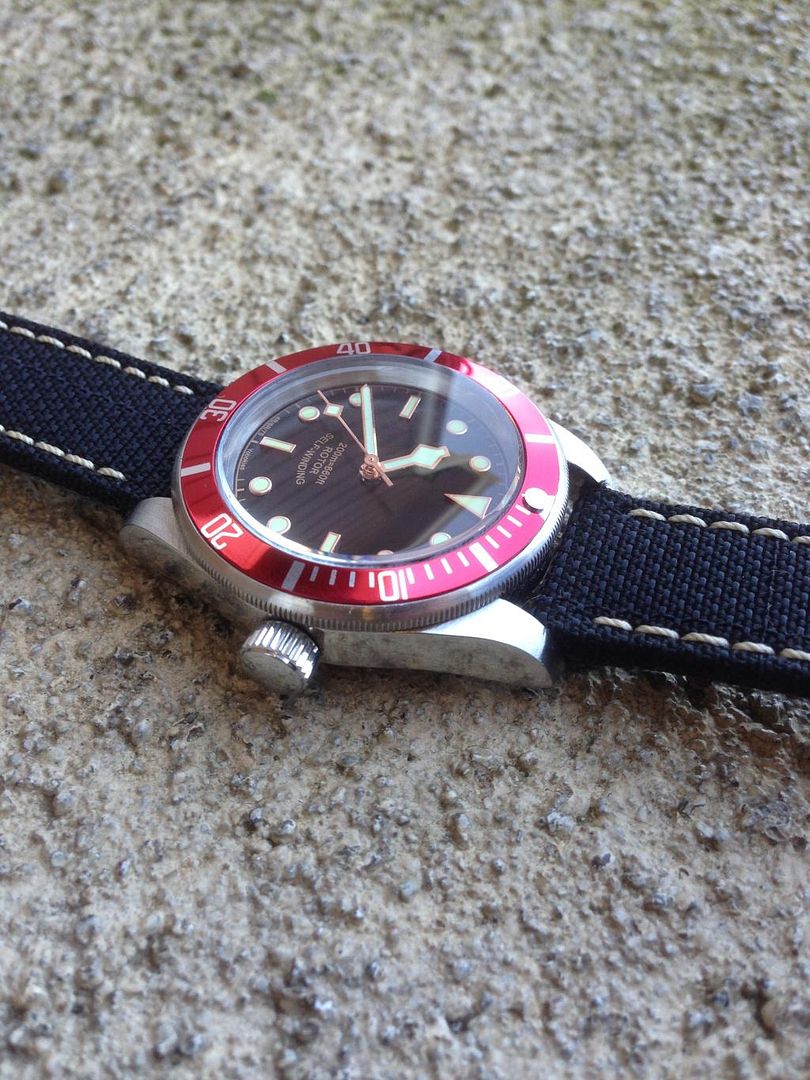
Once installed you should have a nice coin edge watch, enjoy!
Copyright © 2015 All rights reserved by Randy Sass.

This is for entertainment purposes only. If you try this and injure yourself or destroy your watch I cannot be blamed. Also Invicta changes design specs from time to time and I cannot guarantee these instructions will work for any past or future production 8926
This is instruction for the 8926OB with NH35A and NH25A movement.
First you need to read the following article. http://www.stefanv.com/watches/black-lagoon-an-homage-to-the-tudor-heritage-black-bay.html
It wasn't written by me, I don't know the guy who wrote it but he knows what he is doing. Only thing different that I'd do is to remove the crystal before removing the bezel insert. You can get the bezel insert off without risk of damage because you will have access to the underside of it with the crystal out.
Once the Bezel is off the watch you will need several tools.
1. Drill press
2. 1 ½" drum sander kit
3. Some sharp bastard files
4. A selection of wet/dry sand paper 200 grit 400 grit
5. A bench vice
6. A checkering file. Mine is 50 lpi. You may want to try a 40 lpi or a 30 lpi depending on what you are trying to achieve.
Chuck up your drum sander and remove the sand paper. Now turn on your drill press and place a bastard file about halfway down the drum and reduce the diameter of the lower half so that you can slip the bezel insert onto it. About 34.4mm.

Slip the bezel insert onto the drum and tighten the nut on the drum until the bezel is held securely on the drum.
Turn on the drill press and use a bastard file to remove the old coin or scallop edge of your bezel. Start from the side and then I hold the file at an angle to remove the coin or scallop edge. You need to be careful not to reduce the height of the bezel and don't push too hard or you will cause the top edge to turn inward effectively reducing the size of the area for your insert. If you reduce the area for the insert you will need to remove material from inside the bezel lip to get the insert back in, so again, do not push too hard while working the top of the bezel.

Stop often to check your work. You do not want to remove too much material.

Once the coin or scallop edge is gone and the bezel is free of ridges or dips run some 220 grit sand paper over the bezel while it is spinning in the press. Then move to 400 grit. This will clean up some of the lines left by the file.


Once you are satisfied remove it from the press and move to the vice. You will need a padded vice or you will mess up your bezel. I use 2 wood blocks in the jaws of the vice. Place the bezel in the vice and get out your checkering file.

Make sure you are square before you start with the checkering file. Start cutting with the checkering file but do not make the first pass too deep.
| � | |


Run the file back and forth in the same place each pass slightly tilting the file right or left to run as many lines as possible before picking up the file. DO NOT ROCK THE FILE SO FAR THAT THE EDGE OF THE FILE IS CUTTING ANY MATERIAL. THIS WILL CAUSE THE FILE TO CUT DEEPER THAN ANY OF THE OTHER LINES AND YOU WILL HAVE DEEP UGLY LINES EVERY HALF INCH OR SO ON YOUR BEZEL. BE CAREFUL NOT TO DO THIS AS IT IS EASY TO DO. We are laying out the lines right now. You will want to overlap each pass of the file with the previous pass. Do this until you have covered all the area of the bezel you can reach then open the jaws of the vice slightly and turn the bezel until 75% or so of what you have filed is no longer exposed. Work your way around the bezel until you have covered the entire bezel. Now go over your work again with the same file and cut deeper.
Once you have gone all the way around the bezel the second time remove it from the vice and inspect it for any lines that are not cut deep enough or anything else that would cause you concern. If it looks good place the bezel onto the sanding drum on the drill press and run the drill press. Use your 220 grit paper to knock down the burrs on the bezel. Then move to your 400 grit. Stop often to check your work.

When the bezel looks good remove it from the sanding drum and clean it up. I use dish soap and water and an old tooth brush.


Dry it and test fit your original bezel insert to make sure you didn't accidently push material into the area where the bezel resides. If your bezel insert still fits, it is ready to install. If it does not fit you will need to take the tip of the file (no, not the tang of the file, the top of the file) and hook it onto the lip of the bezel where the insert goes and run it around that edge. As you do this apply pressure, you should start seeing a little metal lip form around the bezel as you run the file around the edge. Once that lip is formed all the way around you will want to sand it off. Check to see if your bezel insert fits now. If it doesn't you will need to do it some more until it does fit. The file will want to come out of the lip and when it does it may scratch your bezel. If that happens don't try to fix it until your bezel insert will fit into the bezel. That way you won't have to erase scratches twice.
Once installed you should have a nice coin edge watch, enjoy!

Copyright © 2015 All rights reserved by Randy Sass.
")


